 AudioStrada
Editing
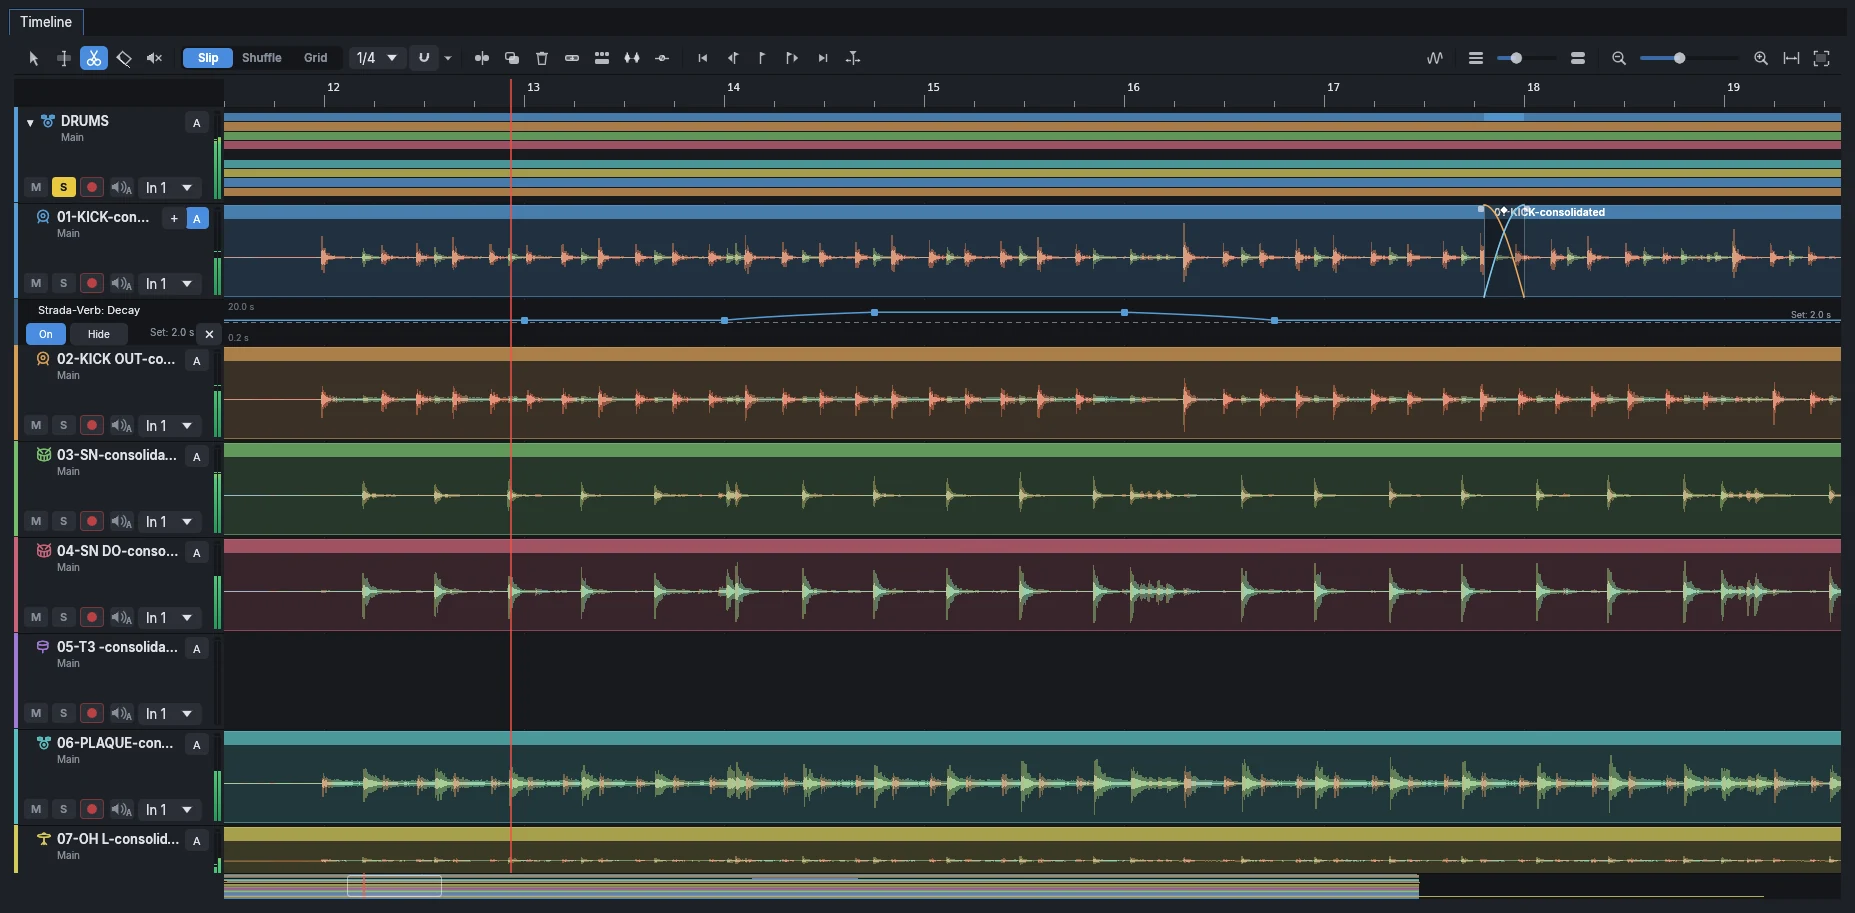
The toolbar
The bar above the tracks holds, from left to right:
- The tools, keys 1 to 5: Smart, Range, Scissors, Eraser and Mute.
- The edit mode (Slip, Shuffle, Grid), the grid value and Snap, with the menu of what edits snap to.
- The editing commands: split, duplicate, delete, heal, consolidate, strip silence, process clips. In a narrow window, they gather under the » menu.
- Markers and navigation: go to start, previous marker, add a marker, next marker, go to end, show the playhead.
- The view, on the right: the waveform menu, the track height and the horizontal zoom, Zoom to fit and Zoom to the selection.
Every button tells its name, keys and gesture when hovered.
The tools
| Tool | Key | What it does |
|---|---|---|
| Smart | 1 | moves, trims, fades and selects ranges, depending on where the pointer is on a clip (below) |
| Range | 2 | dragging selects a time range anywhere, across clips and tracks |
| Scissors | 3 | a click splits the clip there; Alt-click splits every track |
| Eraser | 4 | a click deletes a clip; dragging deletes every clip it passes over |
| Mute | 5 | a click mutes or unmutes a clip; dragging does the same to every clip it passes over |
Holding Ctrl+Alt gives the scissors for as long as the keys are down. Escape goes back to the Smart tool.
The Smart tool
What a drag does depends on where it starts on a clip:
| Where | Drag does |
|---|---|
| Lower half of the body, or the name bar | Move (Alt: copy, onto another track too) |
| Upper half of the body | Select a range, across clips and tracks; a click puts the playhead there |
| Left or right edge | Trim |
| Right edge with Alt | Time stretch, pitch kept |
| Top corners | Fade in, fade out |
| Middle of a fade's curve | Bend the curve |
| Middle of the top edge | Clip volume |
| Body with Ctrl | Clip volume |
| Body with Ctrl+Alt | Slip the audio inside the clip, which stays in place |
On tracks shorter than 56 pixels, the whole body moves the clip. Shift-drag always selects a range.
While you drag, a label beside the pointer shows the value: the move in bars and milliseconds and the target track, the new length, the fade's length and shape, the volume in dB, the stretch in percent.
Selecting
Click a clip to select it; Ctrl-click adds or removes one; Shift-click selects every clip from the last clicked one to this one, across the tracks between them. Trims, fades and volume drawn on a selected clip apply to all the selected clips by the same amount. Ctrl+A selects every clip, Escape clears the selection and the range.
A click on a clip selects it without moving the playhead; a click on an empty place moves it.
Edit modes and snapping
| Mode | Key | Behaviour |
|---|---|---|
| Slip | F2 | clips move freely |
| Shuffle | F1 | deleting or trimming closes the gap; the following clips move up |
| Grid | F4 | moves, trims and ranges snap to the grid |
G toggles snapping in the other modes. Ctrl+Shift+= and Ctrl+Shift+- make the grid finer or coarser.
The Snap menu chooses what edits snap to: the grid, clip edges, markers, the playhead and transients. When a position snaps, a thin line shows what pulled it.
Fades and crossfades
- Fades: drag a clip's top corners. Drag the middle of the curve up or down to bend it, Alt-click the curve to step through the shapes, double-click it to straighten it, and right-click for the list of shapes: equal power, linear, fast, slow, S-curve.
- Crossfades: clips that overlap crossfade on their own. The overlap shows as an X with a handle: drag its top edge to lengthen or shorten the crossfade, its body to slide it. Right-click for its shape, or to remove it.
- Fades on a range: with a range selected, Ctrl+F puts fade-ins and fade-outs on the clips at the range's edges; across a cut, it makes a crossfade. With clips selected and no range, it puts short fades on them.
Ranges
A range is a stretch of time on one or several tracks. Draw it with the Range tool, in the upper half of a clip with the Smart tool, or Shift-drag. Then:
- Shift+R makes a range over the selected clips; the Edit menu also makes one from the loop or across every track.
- Ctrl+Shift+R crops the project to the range.
- Ctrl+Shift+Delete removes the section and closes the gap, on every track.
- Shift+Delete clears the section and keeps the gap.
- Shift+L loops the selection; right-click the range for the other commands (insert silence, split at the edges, set the punch).
Clip menu
Right-click a clip: rename, split here (S splits at the playhead), duplicate (Ctrl+D), delete, fade lengths and shapes, volume steps and Reset to 0 dB, normalize, mute, loop these clips, stretch (50 % to 200 %, back to the original speed, or Match project tempo, which detects the clip's tempo), transpose (semitone and octave steps, or the original pitch), slip content, and Open in piano roll for a MIDI clip.
The Inspector (Alt+4) sets exact values, including the stretch percentage and the pitch to the cent.
Clip effects
A clip can have effects of its own, as Reaper's take effects: a reverb on one word, a filter on a fill, an EQ on a single take. The FX button before a clip's name opens them: outlined, the clip has none and a click opens the effect browser; filled, a click opens its effect when it has one. Either way the clip is selected and the rack shows its chain, the clip's name at the top: more effects are added there with +. The rack shows the chain of any clip with effects selected alone; select something else to see the track's chain again. The clip's menu has Add effects to the clip… and Clip effects (n)…. Effects are added, ordered, bypassed and set as on a track, built-in effects and plugins alike.
The clip plays through its effects, then into its track, which goes on through its own effects and fader. A reverb or a delay keeps ringing after the end of the clip. Remove the clip effects takes them all away. Split or duplicated, a clip takes a copy of its effects. Turning a track's effects off turns its clips' effects off too. The export and the freeze hear them; Consolidate and Process clips do not apply them yet.
Automate the clip effects ticks the parameters to automate: each one is drawn over the clip as a curve, flat at the value set to begin with. Its points and segments are edited as in a lane (drag, Shift for fine moves, Alt+drag to bend, click on the curve to add a point, double- click to type a value); elsewhere the clip is moved and trimmed as usual. The curves are timed from the start of the clip's audio: they follow the clip when it moves and its audio when it is trimmed, and a split clip keeps its part of them. They play as the track's lanes do, following its automation mode.
Processing clips
From the Edit menu, or by right-clicking clips or a range:
- Strip silence (Ctrl+U): a window sets the threshold, the shortest silence and what is kept before and after the sound, or takes ready-made settings (General, Vocals, Speech, Toms); the timeline darkens what will go, and the bottom of the window counts the parts kept and the seconds of silence. Keep the sound, the silences, or only cut at the silences.
- Heal (Ctrl+H) joins clips cut from the same audio back into one when they still sit in place.
- Consolidate (Ctrl+Shift+C) renders the selected clips (or the range) of each track into a single new file, with volume, fades, stretch and pitch applied.
- Process clips… (Alt+P) renders clips through a built-in effect, reverses them or normalizes them, as new files. The window says what the process does; Defaults puts an effect's settings back. The originals stay in the project; Ctrl+Z goes back.
The audio editor
Double-click an audio clip, or View › Audio editor of the selected clip, to retouch it in a large window over the timeline; Escape closes it. It is laid out as the note and automation editors, with the same bar, keys (F frames the clip, F11, Control+Cmd+F on macOS, fills the main window) and zoom. Everything happens on the waveform, with the mouse: AudioStrada finds, you decide.
When it opens, AudioStrada listens to the clip. The chips above the waveform say what it found and show it or hide it: Silences, Breaths (the breath before each phrase), Sibilants (each S too sharp), Clicks (mouth, cables) and Clipping (peaks cut flat). A filled dot means the retouch is in use; right-click a chip to remove, repair, switch off or take back all of them at once.
- Levels: every part found has a dashed level line, at its own level on a scale from 0 dB at the top. Drag it down to lower the part: all the parts of that kind follow, the waveform follows as you drag; Alt moves that one alone. At the bottom, the part is removed. Double-click the line to bring it back.
- Silences: the dashed Threshold line, with the level of the clip drawn through time, separates the silences from the sound; drag it up or down to find more or fewer. The default threshold sits above what leaks in between the phrases (the headphones, the room). Squeeze a pause by the ⟷ handle at its bottom: every pause gets that length (Alt: that one), the audio after it moves up and the clip gets shorter.
- Clicks and clipping: each is a mark at the top of the waveform, hollow when found, full when repaired; click it. Marks close together make a bubble with their count: click it to zoom in.
- Edges: pull the edge of any region to fit it.
- Your own parts: drag across the waveform to select a part (the loop follows), then drag its level line, or right-click it: Bring up to the voice's level, Normalize to -1 dB peak, Lower by 6 dB, Remove, Deselect. Escape or a click elsewhere deselects it, and the loop it set goes with it; right-click the ruler or the waveform › Remove loop for a loop set from the timeline.
- Eraser (E): drag across a noise (a chair, a cough) to remove it; click a region to set it aside. Delete sets aside the region under the pointer.
- Original / Retouched, in the bar: hear the clip as recorded or with its retouches. They never change the file: each stays dosable and can be taken back, and Ctrl+Z goes back.
- Listen: press the ruler to hear from there while the button is held, drag to follow the pointer.
- Under: choose another track to draw it in a band below the clip, its hits marked across both: a bass under the kick, backing vocals under the lead. Alt+drag moves the clip, and its hits snap to those of the track under it. Line up moves the clip to where the two line up best; Ø inverts the polarity of the clip's track, when the two cancel each other out.
Tracks
Double-click a track's name to rename it (Enter keeps it, Escape cancels). A name too long for the header ends with "…" and shows whole when hovered.
The track header menu holds: rename, colour, Stereo track, duplicate, delete, move, freeze, bounce to a new track, export the track alone, new playlist, automation.
- Track › Add audio track (Ctrl+Shift+T) adds a track below the selection, Add audio tracks… (Ctrl+Shift+N) several at once: as many as you like, named and numbered, or a ready-made set (a drum kit, a guitar or a bass DI and amp, vocals). The new tracks can take the inputs one after the other and be ready to record.
- Ctrl+Up and Ctrl+Down select the previous or next track, Alt+Up and Alt+Down move it.
- With two tracks selected, Convert to a stereo track makes one of them ("Overhead L" and "Overhead R" become "Overhead"). The names tell left from right, else the upper track is the left one; Ctrl+Z brings both back.
Navigation and zoom
- Zoom: + and -, or Ctrl+wheel, around the pointer when it is over the clips, else the playhead. F fits the whole session.
- Zoom to the selection: Z zooms on the range or the selected clips; Z again goes back to the previous view.
- Track height: drag the bottom edge of a track's header (double-click it for the default height), or Alt+wheel and Ctrl+Shift+Up / Ctrl+Shift+Down for every track. Compact, over the track headers, brings every track to its smallest height; a second click gives them their height back. Master track beside it shows or hides the master's track.
- Overview: the strip under the tracks shows the whole song in miniature with the visible part framed. Drag the frame to scroll, drag its edges to zoom, double-click to fit.
- Transients: Tab and Shift+Tab take the playhead to the next or previous hit of the selected track's clips.
- Markers: M adds a marker at the playhead; . and , jump between markers. When the playhead jumps (to the start, the end or a marker), the view follows it. Right-click the ruler or an empty part of a track for Add marker here. Click a marker, its flag or its name, to put the playhead on it; drag it to move it; double-click it to rename it (Enter keeps the name, Escape cancels).
Waveforms
The waveform menu in the toolbar chooses how audio is drawn:
- Scale: linear, logarithmic (quiet details show) or rectified (level only, twice as tall).
- Colours: the track's colour, or spectral colours (lows red, mids green, highs blue).
- Channels: separate or merged; Each clip as tall as it can be fills the track's height.
Alt+Shift+Up / Alt+Shift+Down or Alt+Shift+wheel zooms the waveform vertically, Alt+Shift+0 resets it. Peaks that reach 0 dBFS are marked in red. Zoomed in far enough, the waveform shows each channel and the samples themselves, to check the phase between two tracks.
A bus shows the clips of its tracks in miniature, one thin band each.